I am so excited to say that we finally purchased a beach house! Of course one of my favorite parts is getting to decorate it! It came somewhat furnished but I have been purchasing a few things. Ahem...Here are my plans...
 |
| kitchen before |
This is the before of the kitchen. My husband doesn't like the purple cabinets but I'm thinking it's kind of beachy so let's see if I can make it work. I love everything else, the glass tile back splash, the solid surface counter top, the white upper cabinets, the stainless steel appliances. These things are all easy to work with. However, while I usually like a pot rack, I think I'm going to take it down and add 2 hanging lights over the island instead. I only have one light box in the center, so I'm going to see if I can hang 2 lights from one box and swag them over to be even over the island. I've seen it done but don't know how to do it and the Internet is not helping. If I figure it out, I'll let you know...
So this is what I have ordered but I still need a canopy too. The light fixture and the rope swag kit are both from World Market.
 |
Living Room before |
This room has really good bones. Wood floors and ceilings warm up the room which could be cold with the white walls. It's hard to tell here but the walls have painted ship lap which I LOVE. What I don't love is the red sofa. Not exactly calming at the beach. The other thing that has to go is the fan. Even though it has palm leaves for blades, it is just too dark and heavy for the room. It is very distracting too because it is not centered in the room. This would drive me crazy.
 |
| Living/Dining before |
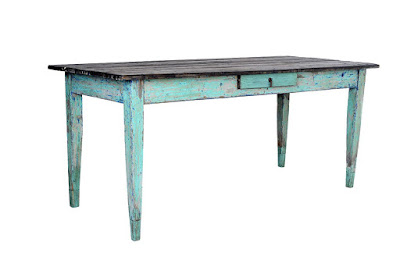
There isn't a dining table now in the room but I really wanted one. In order for this to work, I had to get a sectional and put it next to the wall so that there is more room under the windows to the right. I purchased a table and 2 benches from one of my favorite stores, El Paso Import Company. They have great pieces for the price and can even custom make furniture to your specifications. I decided on benches so that they can easily slide under the table when not in use to create more room. Below is the vintage table that I ordered.


I have something really cool picked out for over the table but I'll save that for the reveal!
 |
| Master Bedroom before |
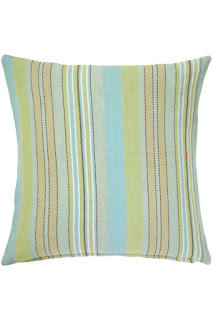
The master bedroom has gone from this yellow above to white. There isn't anything wrong with the yellow. It is certainly bright and cheery but I just love a white wall with crisp white linens for the beach so I had to do it. I bought a king size bed and the headboard will be made out of shutters. This storage bed is cool though so I moved it upstairs to the guest room. The color scheme in here will be inspired by some Dash and Albert pillows that I already had.
 |
| Bunk Room before |
This room will now be the bunk room. Since I have two growing teenage boys now, an ordinary twin bunk was not going to fly so I found a company that will custom make heavy duty QUEEN sized beds which, believe me, are very hard to find! I purchased them from The Bunk and Loft Factory. Unfortunately, we (meaning my husband and sons) will have to put it together. I'm kind of digging this rattan chair so it's going to stay. I am "trying" to recover the chair with a Mexican blanket. If it works, I think it will be super cool and durable.
 |
| Guest Room before |
Again, there is really nothing wrong with the before picture of this room, but it's just not me. In this room I'm going to use some warm colors mixed in with darker teals and purples. I was inspired by some Kantha throws that I found at Vintage Market Days. At first, I was going to use them on the bed but I noticed that the windows really needed something so I'm making some valances with the throws to add a little color. I want kind of a Boho beach look in here.
This gives you a good idea of the color scheme that will go in this room. Luckily, the previous owners left some cool posters in exactly the colors that I wanted to use. They had shiny black frames that just didn't seem fitting so I changed them up a bit. I'll show you my trick to doing this cheaply a little later.
That's about it for the plans for the main parts of the house. Stay tuned for the reveal of all of the rooms which should be finished in a couple of weeks. I hope...if "WE" can get that bunk bed put together that is.


No comments:
Post a Comment